My Guide to Setting Up a Dedicated Podcast Recording Space.
My Guide to Setting Up a Dedicated Podcast Recording Space
So, you’ve got a fantastic podcast idea bubbling, compelling stories to share, or expert insights ready to drop. You’ve probably even thought about the snazzy intro music and your first guest. But before any of that magic happens, there’s one critical, often overlooked element that can make or break your podcast’s perceived quality: your recording environment. Trust me, a dedicated space isn’t just a luxury; it’s the bedrock of professional-sounding audio. As someone who’s navigated the maze of muffled recordings, echoey rooms, and the incessant hum of a refrigerator, I’ve learned firsthand the transformative power of a properly set up recording area. This isn’t about building a million-dollar studio; it’s about optimizing what you have, making smart choices, and creating a sanctuary where your voice can shine without unwanted distractions. Let’s dive into my personal guide to crafting that perfect sonic haven.
Finding Your Sonic Sweet Spot: The Right Room Matters
The very first step in setting up your dedicated podcast recording space is perhaps the most crucial: choosing the right room or corner. You might not have the luxury of a soundproof bunker, but you absolutely have control over selecting the quietest, most acoustically forgiving area available to you. Think of this as scouting your primary location – the foundation upon which everything else will be built.
Assessing Your Available Options
- Smallest Room, Best Friend: Generally, smaller rooms with more “stuff” in them (bookshelves, furniture, curtains) are better than large, empty ones. Large, empty rooms are notorious for echo and reverb, which can make your voice sound distant and unprofessional.
- Noise Audit: Spend some time in potential spaces at different times of the day. Listen. What do you hear? Is there a constant hum from a fridge, the whir of a computer fan, traffic noise, or noisy neighbors? Your ears are your first and best diagnostic tool.
- Proximity to Disturbances: Avoid rooms directly adjacent to kitchens, bathrooms, busy streets, or loud HVAC units. Even faint background noise can become glaringly obvious once you record and amplify it.
- Power Access: Ensure your chosen spot has easy access to multiple power outlets. You’ll need them for your computer, audio interface, lights, and potentially other gear. Think about where your cables will run to minimize trip hazards.
Quick Wins for Room Selection
If you’re limited on space, don’t despair. A walk-in closet, a quiet corner of a bedroom, or even a pantry can be surprisingly effective. The key is finding an area that naturally dampens sound and minimizes external intrusion. My first “studio” was a repurposed closet, and it worked wonders!
Silence is Golden: Mastering Your Space’s Acoustics
Once you’ve picked your spot, the next mission is to make it sound good. This is where we delve into the world of acoustics. Many people confuse “soundproofing” with “acoustic treatment.” While soundproofing aims to prevent sound from entering or leaving a space, acoustic treatment focuses on controlling the sound *within* the space itself, reducing echo and reverb. For most home podcasters, acoustic treatment is far more achievable and impactful.
Taming the Echo and Reverb
The goal is to absorb sound reflections. Hard, flat surfaces are the enemy here. Think about what’s in your room:
- Walls: Bare walls are highly reflective. You can use purpose-built acoustic panels, but even heavy blankets, tapestries, or thick curtains can make a significant difference. Don’t forget behind your recording position!
- Windows: Windows are notorious sound reflectors and can let in external noise. Heavy, floor-length curtains or even moving blankets hung over them can help immensely.
- Floors: Hardwood or tile floors will bounce sound around. A thick rug or carpet is your best friend here. The bigger and thicker, the better.
- Furniture & Bookshelves: These are natural diffusers and absorbers. A room filled with varied furniture, bookshelves packed with books, and soft furnishings will inherently sound better than an empty room.
- DIY Solutions: Don’t underestimate the power of everyday items. Foam mattress toppers, moving blankets, thick duvets, and even pillows can be strategically placed to absorb sound. Consider building simple DIY acoustic panels using rockwool or Owens Corning 703 wrapped in fabric. (Learn more about acoustic treatment basics here.)
Addressing External Noise
While full soundproofing is difficult, you can mitigate external noise:

- Door Gaps: Use door sweeps and weather stripping to seal gaps around your door. A heavy blanket draped over the door can also provide a temporary barrier.
- Window Seals: Check for any gaps or cracks around your windows and seal them.
- Strategic Placement: Place your microphone as far away from windows and doors as possible.
Beyond the Mic: Arranging Your Essential Podcasting Arsenal
With your room acoustically treated, it’s time to bring in the gear and arrange it for optimal performance and workflow. This isn’t just about plugging things in; it’s about creating an efficient, comfortable, and quiet setup.
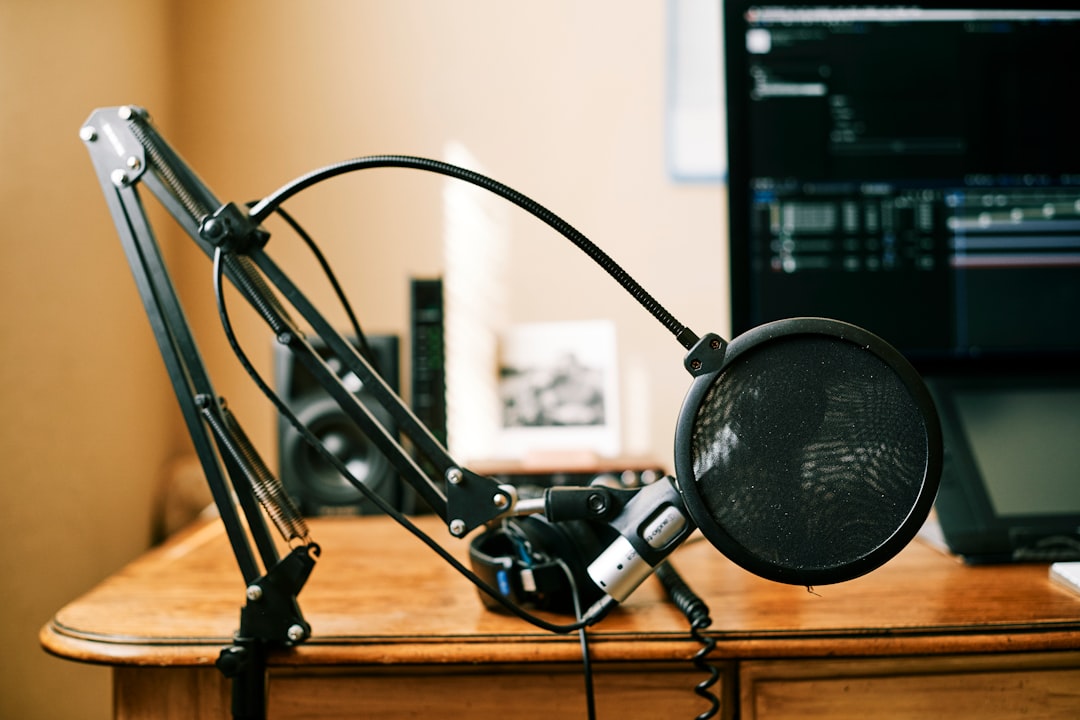
Microphone Mastery and Placement
- The Right Mic for the Job: While condenser microphones offer incredible fidelity, they are also highly sensitive and pick up *everything*. For untreated or semi-treated home studios, a dynamic microphone (like the Shure SM7B or Rode Procaster) often performs better at rejecting ambient noise. (Choosing the Right Microphone for Your Podcast)
- Proximity is Key: Regardless of your mic choice, get close to it – typically 4-6 inches. This utilizes the “proximity effect,” which boosts bass frequencies and makes your voice sound fuller, while also reducing the relative level of background noise.
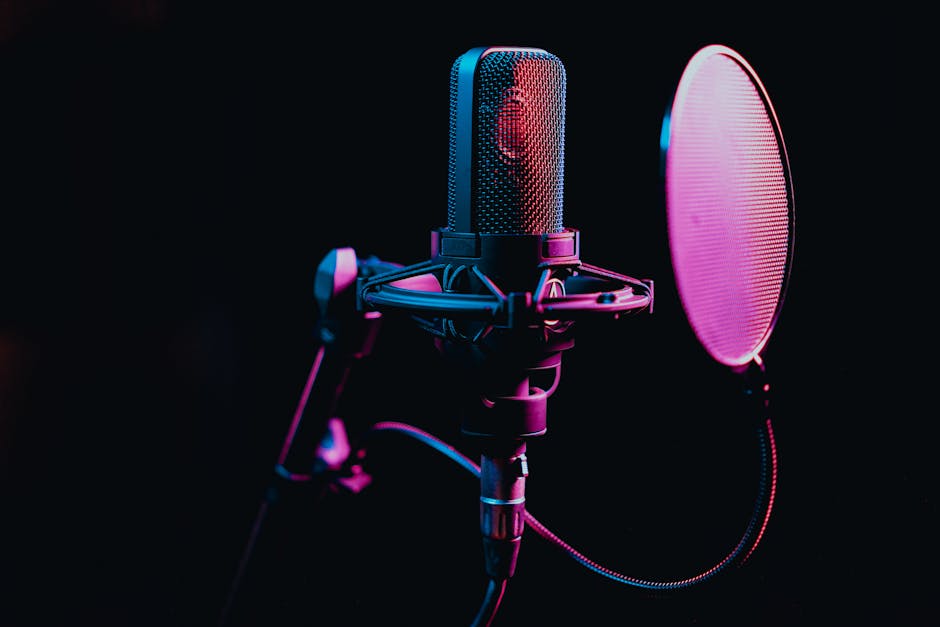
- Pop Filter & Shock Mount: These are non-negotiable. A pop filter eliminates harsh “plosive” sounds (P’s and B’s), and a shock mount isolates your mic from vibrations transferred through your desk or stand.
- Mic Stand: A good boom arm or desk stand allows for precise positioning and keeps your mic steady.
- Understanding Polar Patterns: Most home podcasters will use cardioid microphones, which pick up sound primarily from the front. Position your microphone so its “dead zone” (the rear) faces the most significant noise source (e.g., a noisy computer or window). (Learn about microphone polar patterns.)
Audio Interface and Computer Setup
- Interface Placement: Your audio interface (which converts your mic’s analog signal to digital for your computer) should be easily accessible but not directly under your microphone, as some can emit a faint hum.
- Computer Noise: Laptops and desktops can generate fan noise. Position your computer as far away from your microphone as possible. If feasible, place it under the desk, in a closet (with ventilation), or even in another room with a long USB/Thunderbolt cable.
- Headphones: Use closed-back headphones to monitor your audio without sound leaking into your microphone.
Cable Management: The Unsung Hero
A tidy setup isn’t just aesthetic; it prevents tripping hazards, reduces interference, and makes troubleshooting easier. Use cable ties, velcro straps, and cable clips to route your cables neatly along your desk legs or walls. Labeling cables can save you a headache later.
Ergonomics & Ambiance: Crafting a Creative, Comfortable Hub
A dedicated podcast recording space isn’t just about sound; it’s also about creating an environment where you feel comfortable, focused, and inspired. You’ll be spending a lot of time here, so make it work for you.
Your Comfort Zone
- Ergonomic Chair: Invest in a comfortable, supportive chair. You’ll be sitting for extended periods, and good posture is vital for both your health and breath support. Avoid squeaky chairs! (OSHA provides excellent guidance on ergonomic workstations.)
- Desk Height: Ensure your desk is at a comfortable height that allows your arms to rest at a 90-degree angle while typing or using your mouse. Adjustable desks are a game-changer.
- Monitor Placement: Your


Post Comment